In this entry, we'll deal with mainly the front skirts of HG kits. For some of you know HG front skirts are molded as one part in the runners. But Bandai gives us option to cut it in the middle so when we do some poses of our kits, the skirts would follow the articulation perfectly.
We now concentrate on the front skirts that are cut into two and are loosely connected when built back into the crotch part of the kit.


If you're having this problem when posing your kit, then this entry might help you out.
Here's what you need
Pliers
paper clip (small)
Side Cutter
Super Glue
Blade (X-acto)
pin vise or drill bit(same diameter as paper clip)

Okay!! Let's start!!!
STEP 1: Disassemble the kit. Take off the front skirts in particular.

See here. This is how the front skirts are placed in the middle front armor. See how I cut them into separate parts, the left and the right.

STEP 2: For this model, HG Wing Gundam Fenice Rinascita, the front skirts needed to be trimmed to expose the ball joint. Here's what I did on the left and right front skirts.


As you can now see on the next picture, ball joints are now exposed.

Notice that there is now a gap between the two ball joints. This is true to some model kits. Others have out right ball joints sticking side by side to each other. So don't expect to see the same thing in all model kits.

Here we start the tightening of the front skirts. By applying a metal brace in these two ball joints, the brace will support the joints not to wobble in any direction.
STEP 3: Start by drilling a hole at the center of each ball joint.


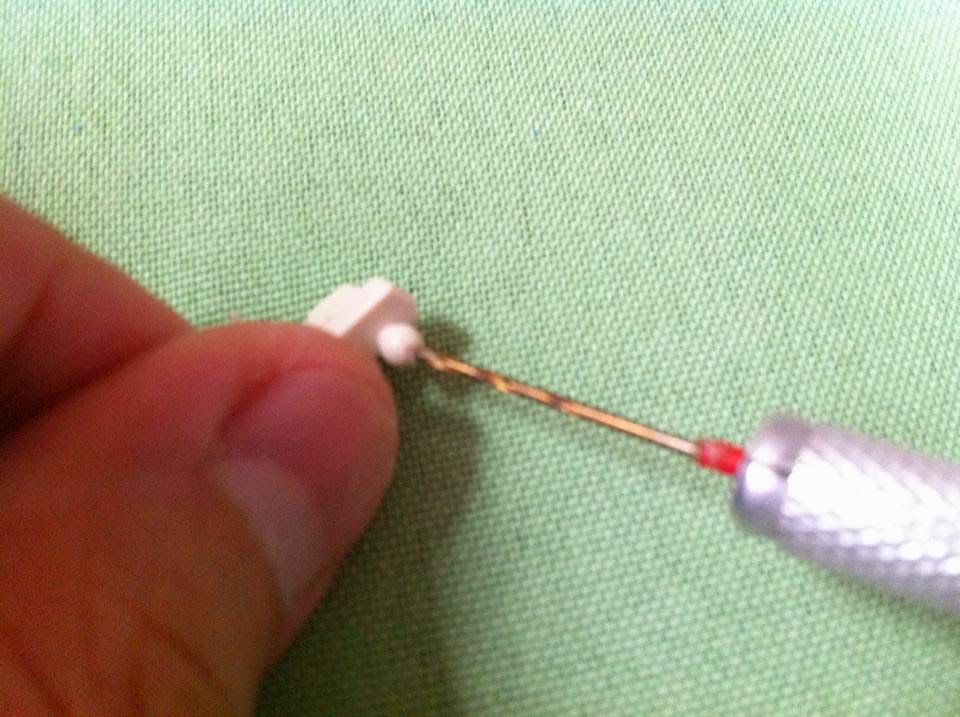

STEP 4: Super glue or cement the paper clip inside one of the ball joint (either left or right, depends on you).


STEP 5: Cut the paper clip into size to fit the distance between the two ball joints.

Test fit.

Make sure the you cut the brace a bit longer than the distance between the ball joints. Also note that you do not super glue or cement the other ball joint to the brace.

Test fit into the model kit. Reassemble the kit and see how tight the front skirts are now.


Let's try some action poses.


There you go!! all better. Just to show you that you can do this to other kits, here is my HG Lightning Gundam with the same problem.


Once done, fixing the front skirts, Action poses are no longer awkward looking. They now follow the motion of the action being posed by the model kit.


See them together here with better front skirt articulations.

And that's how you address this issue.
Hope this helps you guys out, cause it helped me a lot just doing this :D
Any questions or other issues you'd like me to address, you may message me thru:
Facebook: https://www.facebook.com/aro9nes
email: andrewnaynes@gmail.com
Until then... See ya!!!!
No comments:
Post a Comment