This time,a friend asked about what to do on the peg of the Action Base when it breaks. just like this
.jpg)
.jpg)
On this tutorial, you'll get a bonus. This entry is a 2 in 1 repair blog. I'll show you how to fix 1 problem in two ways. It's up to you to choose which one is more convenient.
Before starting the repair, Here's what you need.
Flexi wire (galvanized wire (1.0mm))
Pliers
Side cutters
File
Pin vise with 1.0mm and 2.0mm
Super glue
Sprue or runners
.jpg)
Let's start with the first method.
The first method is "bracing" or putting a brace inside the peg itself.
So here's how it goes.
STEP 1: Using your file, file down the base of the peg and flatten the surface.
.jpg)
STEP 2: File and flatten the peg itself. File the part where it connects to the base.
.jpg)
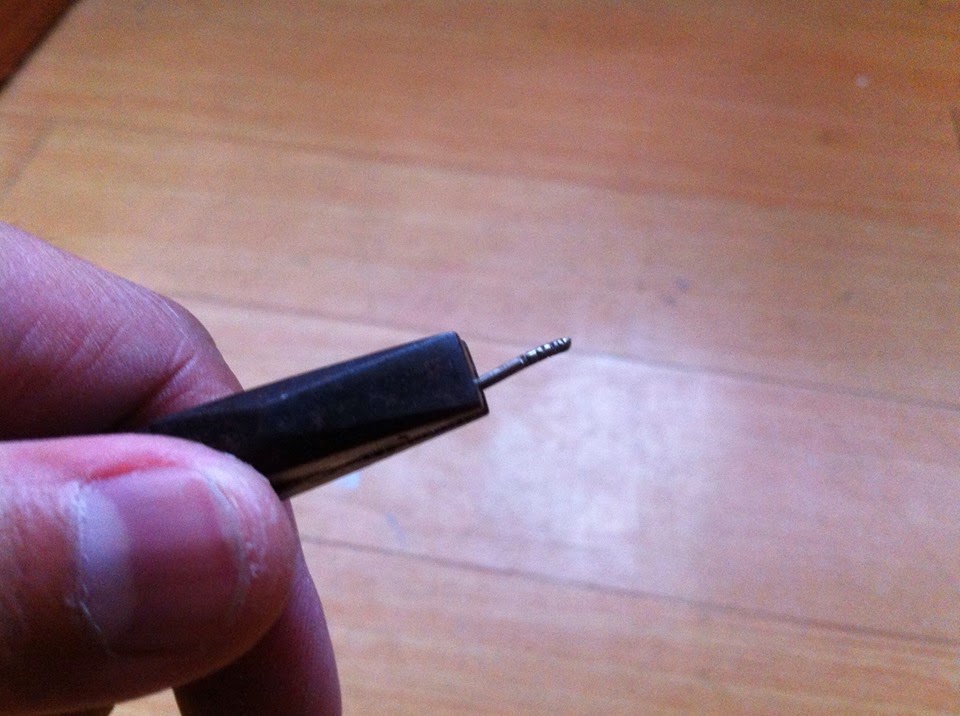
STEP 3: Carefully drill the center of the peg and the base of the peg. Use the pliers to hold the peg since it is so tiny for your fingers to get a good grip.
.jpg)
.jpg)
.jpg)
.jpg)
STEP 4: Carefully create creases or small grooves on the flexi wire so that the super glue will hold it down when attached inside.
.jpg)
.jpg)
.jpg)
TEST FIT: Test fit the flexi wire if it snugly fits the peg.
.jpg)
STEP 5: Put super glue inside the peg and insert the flexi wire. Also put super glue on the base of the peg . Don't for get to cut the flexi wire before inserting it into the base of the peg.
.jpg)
.jpg)
.jpg)
And viola!! Peg is successfully braced and reattached to its base.
.jpg)
TEST FIT: Test fit a kit and see how the peg and the base hold the weight.
.jpg)
That's it for the first method "bracing"
Next, the second type of repair, peg replacement.
I do apologize for this tutorial that I don't have another Action Base 2 peg that is broken. So instead, I'll be using the peg of an Action base 1 which is commonly got from HG kits.
.jpg)
So let's start the second repair. By the way, we'll still use the same tools mentioned above.
STEP 1: Same as the first repair, File and flatten the surface of the base of the peg.
.jpg)
STEP 2: At its center, drill a hole using the 1.0mm drill bit. This will be our guide to make the center hole centered in the base of the peg.
.jpg)
STEP 3: Use the 2.0mm drill bit this time to create the hole deep enough for the replacement peg. We are actually making a deep foundation for the peg to hold, same as when constructing a building. It needs a great foundation.
.jpg)
STEP 4: Cut from the sprue or left over runner a piece of rod. This will act as the replacement peg.
.jpg)
STEP 5: Using the pliers, hold the sprue/ runner rod and file and smoothen the sides and edges so it will easily fit the hole we made on the base of the peg.
.jpg)
STEP 6: Put Super glue on the hole on the base of the peg. And carefully insert the sprue/runner rod or the replacement peg into the hole.
.jpg)
.jpg)
STEP 7: File and smoothen the edges so it will fit the kit.
.jpg)
And Viola!!!! It is done!!!
TEST FIT: Test fit the peg if it holds the kit well as it used to.
.jpg)
And there you have it. Easy and simple. The whole concept of bracing may be applied to different scenarios involving a broken peg. Bracing can be use if you broke the elbow joint of your Gunpla kit, Connector joint of a weapon on the Gunpla kit's back, An accessory broken in two parts and many more.
And that's it for this issue.
Any questions or other issues you'd like me to address, you may message me thru:
Facebook: https://www.facebook.com/aro9nes
email: andrewnaynes@gmail.com
Until then... See ya!!!!
No comments:
Post a Comment